Being an intuitive and easy-to-use framework, Nuxt.js is an excellent choice for building sites. Since it is based on a modular architecture, we can extend Nuxt.js to its fullest potential for more complex scenarios. With the help of its modules ecosystem, you can save development time and enjoy a great developer experience while still maintaining your initial Nuxt.js project's goal.
This post will explore some of the most useful Nuxt.js modules for building a fast, beautiful, and SEO-friendly Nuxt.js project.
TL;DR
In short, the following modules are the must-have to enhance the UI of your Nuxt.js project:
@nuxtjs/svg-spritefor handling SVG icons.@nuxt/imagefor handling images.@nuxtjs/tailwindcssfor styling.
Want to understand how to use them correctly? Let's dive into the details.
A small recap of Nuxt.js
Nuxt.js, or in short Nuxt, is a progressive Vue.js framework for building modern web applications. With an active ecosystem of extendable modules, Nuxt.js offers developers a smoother and more enjoyable development experience. Now developers can focus on building and maintaining the core codebase, while the Nuxt engine takes care of the deployment per need, as shown in the following diagram.

So, what are the must-have modules for building a Nuxt.js project? Let's find out.
Handling SVG icons with SVG-Sprite module
SVG Icons are a great way to add visual elements to your site, as they are easily scalable, accessible and can be used in any context. As presented in his talk in Vuejs Amsterdam 2020, Dima Vishnevetsky has shown us why we should always consider SVG icons, over other graphics formats.
However, handling SVG icons in any application can be challenging, especially when there is no single standard to follow. One common way is to create SVG sprites and consume them within your application. This approach requires some manual work, and scalability is sometimes questionable.
To help solving this challenge, the Nuxt community offers nuxtjs/svg-sprite module.
Install and use SVG-Sprite module
To use the module, you need to perform the following steps
- Install the module using
yarn add @nuxtjs/svg-sprite # or # npm i @nuxtjs/svg-sprite - Add it to
buildModulessection of yournuxt.config.jsfile, and provide your configurations if needed./* nuxt.config.js */ export default { buildModules: [ "@nuxtjs/svg-sprite" ], svgSprite: { // manipulate module options }, } - Place your SVG files in the
assets/sprite/svgdirectory (or any custom directory provided in the configuration in Step 2). - The module will inject a global
svg-iconcomponent into your application. You can display any saved SVG icon by using the following syntax:<svg-icon name="your-stored-svg-file-name" />
That's it! We now display the icons in your application. But before we move on to the next module, let's take a small look at how to find the suitable icons, shall we?
Find SVG icons for your application
Using the proper icon set is a crucial step in building a great user experience. However, finding suitable icons is not a straightforward task, with all the different icon sets and sizes available. Luckily, Antfu from the Nuxt.js team has created Icones - a collection of various free icons from different providers, including FontAwesome, Google Fonts and so on. With Icones, you can search and download the selected icons in SVG or Vue component formats.
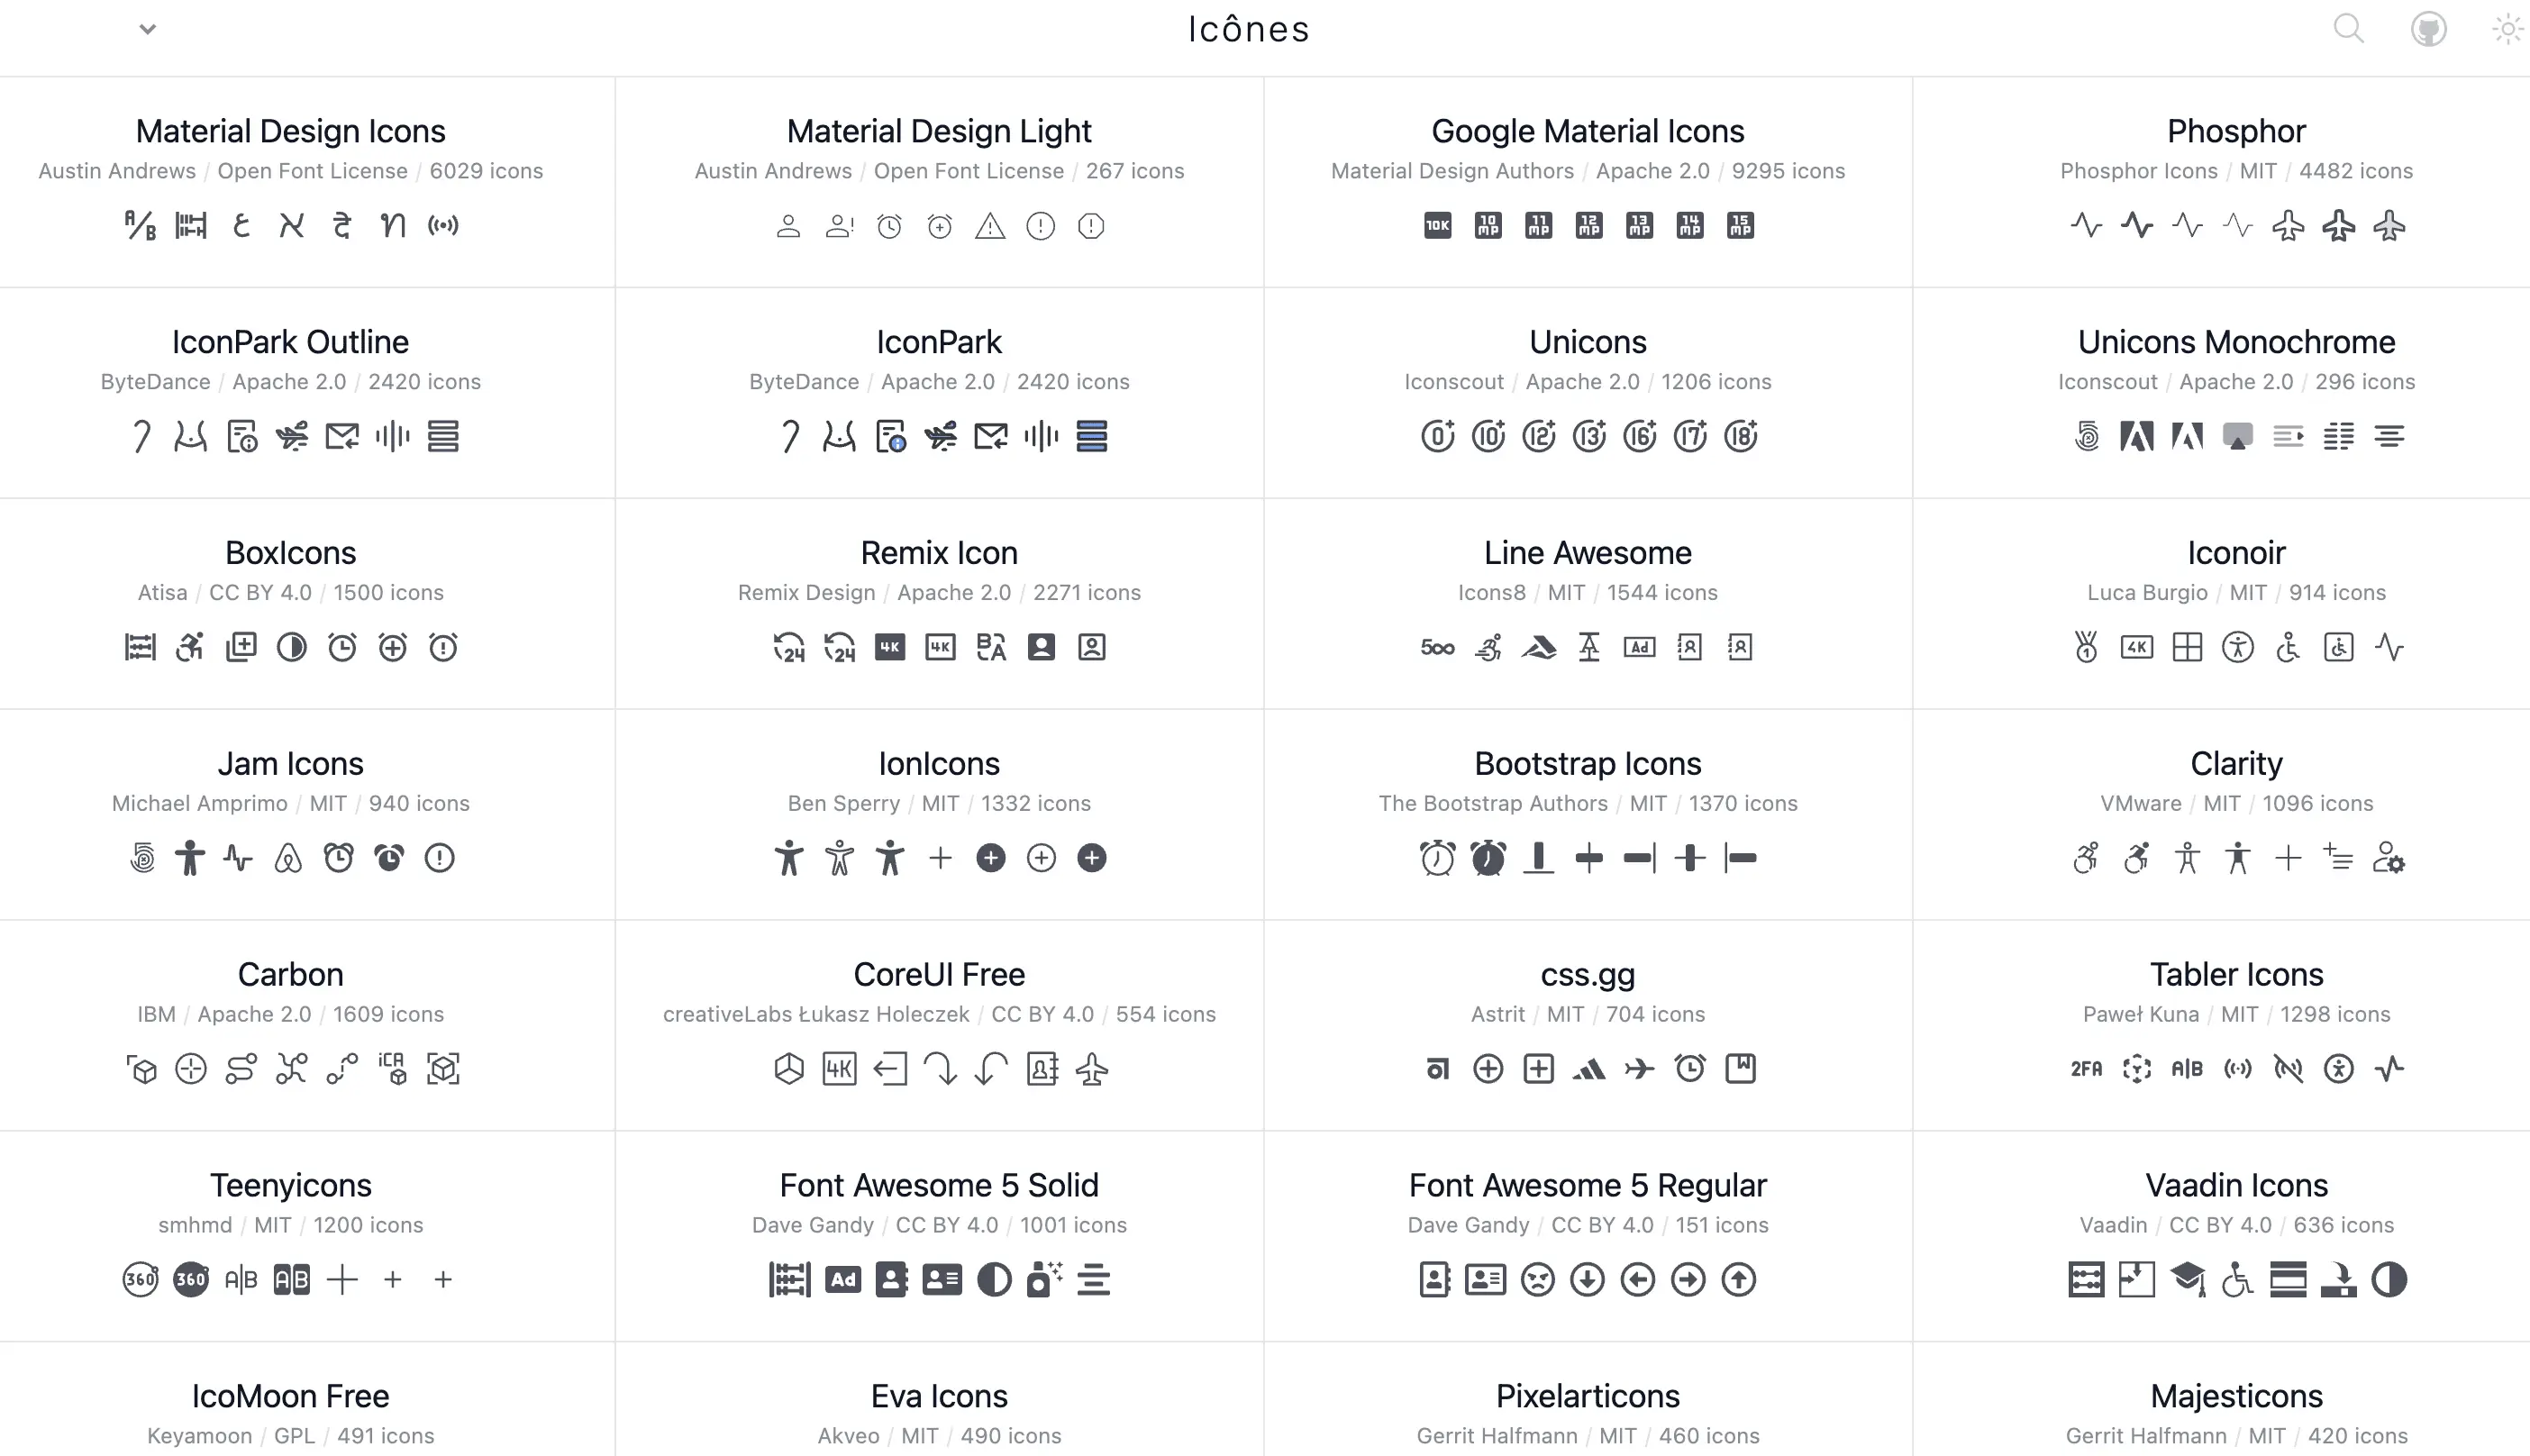
Once you download the needed icons, follow the steps in the previous section to add and consume them in your application.
Handling images effectively with Nuxt Image modules
Introduced this year, Nuxt Image module quickly gained popularity within the Nuxt community, thanks to its capability to handle images effectively. Maintained by the Nuxt team, the image module provides a more straightforward yet powerful way to compress images during the building process, whether with its built-in image provider or with an existing provider like Cloudinary. Furthermore, the image module allows you to set up any custom image provider out of the box, giving you complete control over how you want to upload and optimize your images for your application.
Install and use the module
To start using the module, all you need to do is to perform the following steps:
- Install the module using
yarn add @nuxt/image # or # npm i @nuxt/image - Add it to
buildModulessection of yournuxt.config.jsfile, and set up the configurations for the image provider if needed. For example, to use Cloudinary provider, you can do the following:/* nuxt.config.js */ export default { buildModules: [ "@nuxt/image" ], image: { provider: 'cloudinary', cloudinary: { baseURL: 'https://res.cloudinary.com/<your-cloud-name>/image/upload/' } }, } - Use the global injected component
nuxt-imgto display images with the proper attributes. For instance, to display an image cropped as rounded thumbnail in 300x300px size:<nuxt-img src="example" width="300" height="300" fit="thumb" :modifiers="{ roundCorner: 'max' }" />
And tada 🎉, your image is optimized and displayed as required!

💡Tip: If you only want to auto-upload and provide the fundamental transformations for local images, using Nuxt Image with the default provider may be a good enough choice. For more complicated scenarios, I recommend you try out Cloudinary module for Nuxt.
Beautify your app with @nuxtjs/tailwindcss
TailwindCSS is a robust utility-first CSS framework that helps you build beautiful, responsive websites. It is a free and open-source CSS framework, and it offers developers lots of ready-to-use CSS classes for basic styling properties such as margin, padding, color, etc. In addition, it allows you to create custom CSS classes for your components quickly, and it also provides a robust API for theming and customizing. And at the moment of speaking, TailwindCSS is one of the popular CSS frameworks and is the first choice for building a responsive and beautiful application for many developers.
To allow a smooth and straightforward way to integrate with TailwindCSS, the Nuxt community creates nuxtjs/tailwindcss module.
Setup the module
To use the module, you need to perform the following steps:
- Install the module as dependency using:
yarn add --dev @nuxtjs/tailwindcss #or #npm i @nuxtjs/tailwindcss --save-dev - Add it to
buildModulessection of yournuxt.config.jsfile./* nuxt.config.js */ export default { buildModules: ['@nuxtjs/tailwindcss'] } - Generate the
tailwind.config.jsfile using the following command:npx tailwindcss init
This command will generate the default configuration file at the root of your project. You can always customize the configurations later.// Example of a default tailwind.config.js module.exports = { purge: [], darkMode: false, theme: { extend: {}, }, variants: { extend: {}, }, plugins: [], }
And now your application is ready to use TailwindCSS!
Use TailwindCSS
Each class of TailwindCSS is computed based on the following syntax
${prefix-for-css-property}-${color-key}-${modifier}
An example of classes generated by TailwinCSS for a specific color and modifier is:
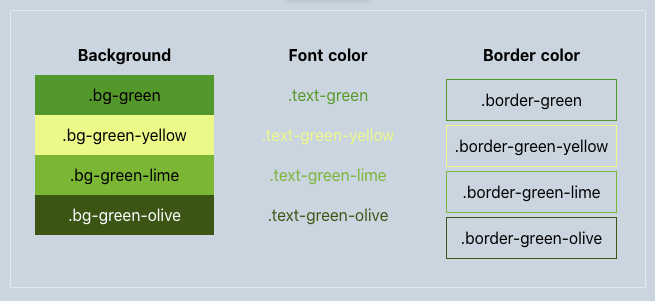
To apply our green palette to the background color of the whole app, add bg-green as a class of the main div of the default layout:
<!-- ~/layouts/default.vue -->
<template>
  <div class="bg-green">
    <Nuxt />
  </div>
</template>
And our green color is now applied to the whole app's background!

💡Tip: TailwindCSS provides a fantastic online playground, where you can learn how to use the framework, play around with different setups, and even create your ready-to-use configurations.
So far, so good? We can even set up our color theme for our application with the help of an additional tool and TailwindCSS.
Create a color palette theme in TailwindCSS
- Upload your logo to Colors Generator Tool.
- Get the primary four color palettes.
- Copy the tool-generated codes and paste them in the
theme.extend.colorssection of thetailwind.config.jsfile. Rename them to the desired color names if needed. - Use the desired CSS class following the naming convention in the previous section.


And we have just had our theme set up within three steps 🎉! Isn't it awesome? 😄
💡Tip: You can also combine with another module such as @nuxtjs/color-mode to create a dark/light theme for your application.
Summary
Developing a web application with Nuxt.js is always a pleasure. With the correct modules setup, you can start building your app faster and more efficiently.
So far, I have uncovered the following modules:
@nuxtjs/svg-spritefor handling SVG icons@nuxtjs/tailwindcssfor styling@nuxt/imagefor handling images in your application
In the next post, we will continue discussing other modules that you can use to enhance your application, especially for SEO and performance.
Meanwhile, if you haven't known Nuxt before, I suggest giving it a try and experiment with their awesomeness and power they can bring to your web development process. And if you built something with Nuxt, please share it with me 🔥.
👉 If you'd like to catch up with me sometimes, follow me on Twitter | Facebook.
Like this post or find it useful? Hit the share button 👇🏼 😉
Learning Vue
Learn the core concepts of Vue.js, the modern JavaScript framework for building frontend applications and interfaces from scratch