In the previous post, we discussed the three valuable modules for styling and enhancing the UI of your Nuxt applications. However, web development is not all about the look; it's also about ensuring SEO for your beautiful sites for many reasons. Unfortunately, SEO is not always so straightforward for developers to set up.
This post will explore the importance of SEO and what modules the Nuxt community offers us to accomplish this task.
TL;DR
SEO is essential for making your site more appealing to users on search results. And to maximize SEO support for your Nuxt project, the following modules are a must-have:
@nuxtjs/i18nfor localization support.@nuxtjs/robotsfor generatingrobots.txtfile.@nuxtjs/sitemapfor generatingsitemapfile.@nuxt/pwafor adding PWA support to your application.@nuxtjs/google-analyticsto enable traffic performance tracking for your site using Google Analytics.
Curious to know more on how to install and when to use these modules?
But first, what is SEO and why is it so important?
Search Engine Optimization (SEO)
Search is one of the primary activities for web users. Web users search to discover content they need, whether online or offline. And they scroll through an ordered list of search results to look for the content that matches their need. The higher your content or site appears on the list, the higher the chance users select it, and thus the more traffic your site will receive.
Search Engine Optimization (SEO) is the way to help your site achieve a higher rank in the search engines so that it can appear higher in the result list given by the search engines such as Google to the end-users.
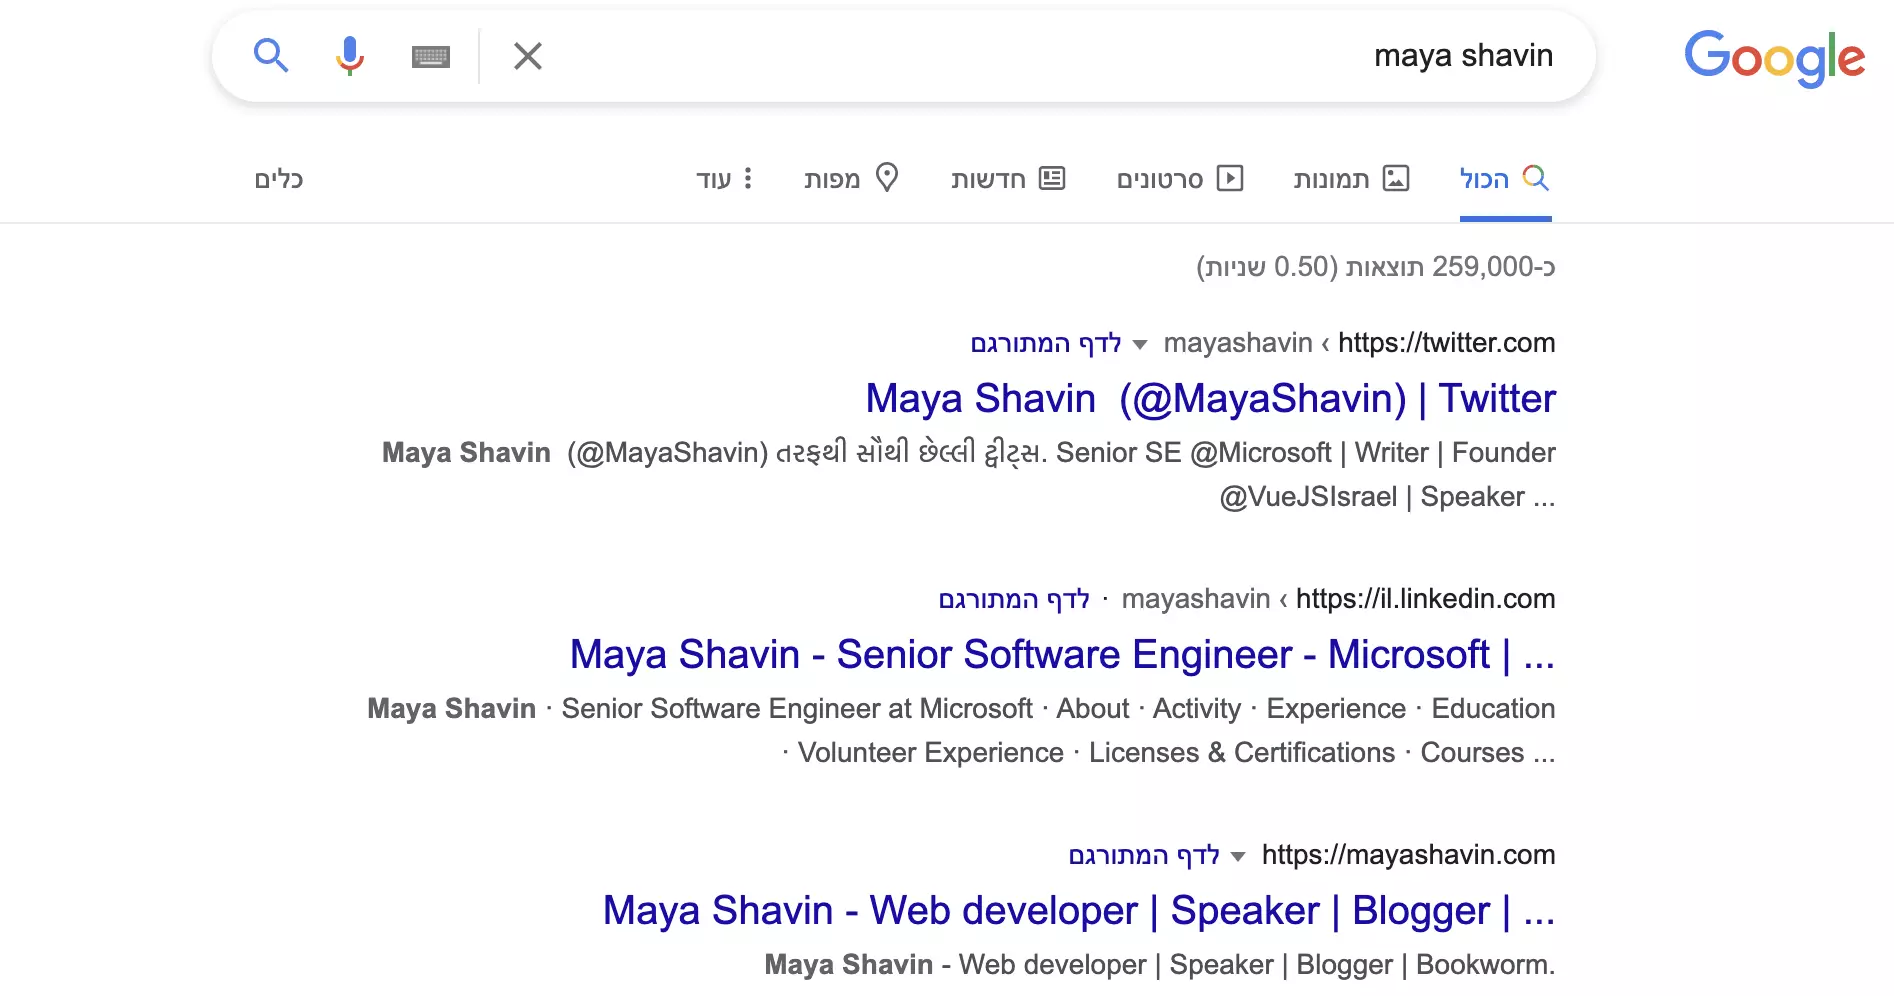
Below is an example of searching for "maya shavin" on Google:
Why is SEO important?
As reported by Moz, appearance on the first page of Google can attract about 70% of search traffic clicks, while the number went down dramatically to below 6% clicks on the second page. Furthermore, the first five in the list receive 67.6% clicks, while the next five receive a much lower number - 3.73% (Zero Limit Web).
Therefore, improving and manipulating search rankings becomes crucial for any online business appearance. And this is where SEO matters.
How to enable SEO?
For any given search query, search engines use a complex algorithm to decide the pages and their order to show based on three core metrics :
- Links to page: the more external links from other sites to your page, the more authoritative it will get in the eyes of search engines.
- Page content: search engines scan the content of the page to decide if the content is relevant to the search keywords.
- Page structure: the HTML structure of the page should be crawlable for search engines, and the relevant titles, URLs, and headers should contain the proper keywords. Page structure includes working internal links, 404-page handling, image links, etc.
So how do we optimize each of these metrics properly with Nuxt modules? Let's find out.
Localization with @nuxtjs/i18n
Not everyone knows English. Hence, not all the search keywords are in English. SEO localization is how you translate your site content to a specific locality or localize your content per users' culture and language preferences. Localization plays a vital role in improving your content's relevance to local users on the search results, reducing the language barrier for your potential users, and more.
To set up localization, as always, takes some effort. Or, you can use the @nuxtjs/i18n module.
@nuxtjs/i18n, an i18n (short for " internationalization") module built on top of vue-i18n package, offers developers a set of out-of-the-box features for optimizing the localization process in a Nuxt application. Some key features are lazy loading of translated messages, redirecting for auto-detected language, route generating, and the capability of providing domain per language.
Set up @nuxtjs/i18n module
To use the module, you need to follow the below steps:
- Install the module as a dependency to your project
yarn add @nuxtjs/i18n

#or
# npm i @nuxtjs/i18n
- Add the module to the
moduleslist innuxt.config.jsand configure the necessary options ini18nproperty.
/* nuxt.config.js */
{
  modules: [
      '@nuxtjs/i18n',
  ],
  i18n: {},
}
- Start using the module in your application
Localize your content with the suitable configuration
You can define a set of locales available within your project. Each of the locales should contain a locale file name that will be assigned specifically to the relevant locale. Take the following, for instance:
[{
  "code": "en",
  "iso": "en-US",
  "file": "content-en.json",
  "dir": "ltr"
}]
in which iso is the ISO code used by SEO for language detection. es-US means ISO 639-1 and ISO 3166-1 alpha-2, which stands for English - United States.
Besides, it uses i18n.langDir field in the nuxt.config.js to know which directory the locale files reside and resolves the path, respectively. For example, in case I place my content-en.json in the static/_lang directory, then I need to set i18n.langDir to point to the right locale directory, as shown below:
/* nuxt.config.js */
{
  modules: [
    '@nuxtjs/i18n',
  ],
  i18n: {
    langDir: '~/static/_lang/',
    locales: [{
      "code": "en",
      "iso": "en-US",
      "file": "content-en.json",
      "dir": "ltr"
    }]
  },
}
In the content-en.json, you can bind the matching translation to certain block variables, as in the following:
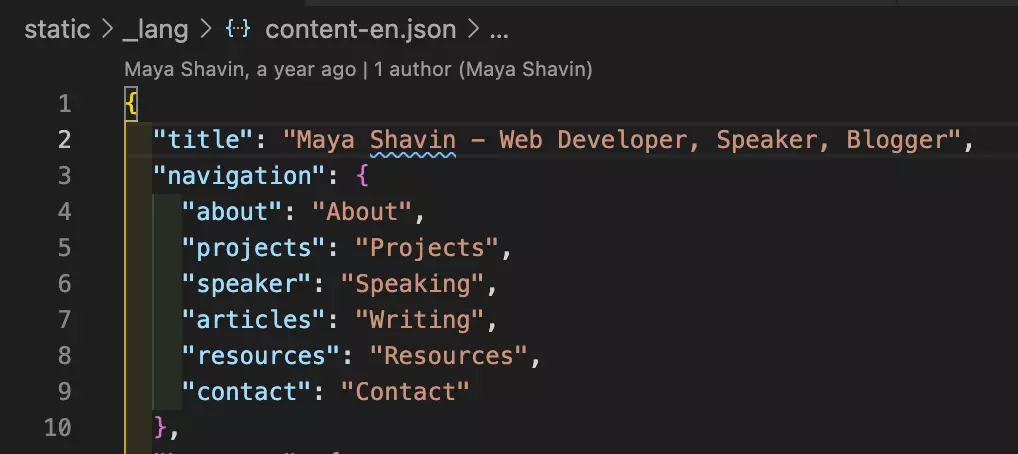
Finally, the module injects an $t global instance for us to access within our application. For displaying the correct text value, you use $t(BLOCK_TEXT). For example:
<!-- component.vue -->
<template>
  <span>{{$t('title')}}</span>
</template>
And it will render the text as defined in the matching locale.
<span>Maya Shavin - Web Developer, Speaker, Blogger</span>
Awesome? The above is a basic use case for the module. There are more advanced and helpful use cases that I strongly recommend you to check out and try implementing in your Nuxt project for better localization support.
Meanwhile, let's continue to our next SEO module, shall we?
Generating robots with @nuxtjs/robots
For indexing your site's pages correctly in the search results, the search engines use mini-programs - "robots" to your site. And to ensure these robots can access only the desired pages is essential for both SEO and site privacy. Thus comes the role of robots.txt. This robots.txt file informs these robots which page on your site to access; and index and which page they should not.
A syntax example of the robots.txt file is as follows:
User-agent: *
Disallow: /success

Sitemap: https://yoursite.com/sitemap.xml
in which:
User-agentspecifies which type of robot to block. Here the value*applies to all robots.Disallow: /successspecifies that the defined robots inUser-agentabove will not have access to the pagehttps://yoursite.com/success. If you leave it empty, the robots will have access to all the pages. OneUser-agentcan have multipleDisallowcommands and vice versa.- An empty line indicates the next command doesn't tie to the previously defined
User-agent. Sitemapspecifies the location of a sitemap index file. As seen in the example, the location must be a qualified URL. This field is independent of any user agent.
On the contrary to Disallow, we can use Allow to specify which pages we would like to grant access to the robots.
💡 I recommend you check out the Google Developers documentation on robots.txt for more detailed information on other rules and supported commands.
To generate the robots.txt file is not a challenging task. You can use external tools such as Google Webmaster Tools, download the generated file, and place it at the root of your website's root directory. Or you can use the Nuxt module - @nuxtjs/robots to handle all these steps without any external tool for your Nuxt project.
Use @nuxtjs/robots
@nuxtjs/robots is a small Nuxt module that helps to generate a robots.txt file. To start using the module, you need to perform the following steps:
- Install the module as a dependency to your project
yarn add @nuxtjs/robots

#or
# npm i @nuxtjs/robots
- Add the module to the
moduleslist innuxt.config.js.
/* nuxt.config.js */
{
  modules: [
    '@nuxtjs/robots',
  ],
}
- Configure the module through
robotsfield innuxt.config.js
/* nuxt.config.js */
{
  modules: [
    '@nuxtjs/robots',
  ],
  robots: [{
    UserAgent: '*',
    Disallow: ''
  }],
}
And during the build process, the module will auto-generate the robots.txt file, place it in the root directory of the built code, ready for deployment.

Build sitemap with @nuxtjs/sitemap
Sitemap file specifies information including videos, images, pages, etc... and the relationships between them on your site, to help the search engines crawl the site better. Sitemap helps search engines discover all the pages, essentially when the site contains many isolated content pages or rich media content like videos and images.
There are several guidelines to follow in creating a sitemap file. In short, it is a challenging task, especially when we need to ensure the sitemap also contains the dynamically generated content page routes, which get developed only during the build process, before deployment.
But no worry, we have @nuxtjs/sitemap - Sitemap module for the exact purpose.
Install and use @nuxtjs/sitemap
Based on Sitemapjs library, Nuxt Sitemap Module offers out-of-the-box support for i18n routes using @nuxtjs/i18n module, while generating the sitemap dynamically.
To use the module, you need to do the following steps:
- Install the module as a dependency to your project
yarn add @nuxtjs/sitemap

#or
# npm i @nuxtjs/sitemap
- Add the module to the
moduleslist innuxt.config.js
/* nuxt.config.js */
{
  modules: [
    '@nuxtjs/sitemap',
  ],
}
- Configure the module options through
sitemapinnuxt.config.js
/* nuxt.config.js */
{
  sitemap: {
    hostname: 'https://yoursite.com',
    exclude: ['/secret', '/admin/**']
  },
}
sitemap can receive a function, an array of sitemaps, or a boolean value toggling sitemap auto-generation. We can even define the routes and their settings for the sitemap explicitly.
But how do we generate a sitemap for dynamic content pages?
Generating dynamic routes for the sitemap file
By default, the Nuxt engine and the sitemap module don't generate dynamic routes (post links, for instance).
To define routes for a sitemap file, we use the sitemap.routes field. We pass a function that returns an array of routes to sitemap.routes for dynamic routes. Assume we use the @nuxt/content module for writing content such as blog posts; we need to perform the following logic within the routes function:
- Fetch all the post files using the
$contentinstance from@nuxt/content.
const posts = await $content('posts', { deep: true, text: true })
  .where({
    extension: '.md'
  })
  .fetch()
- Compute and return the routes based on post slugs
return posts.map(post => ({
  url: `/articles/${post.slug}`,
  lastmod: post.updatedAt || post.createdAt
}))
Our final code should be as below:
/* nuxt.config.js */
// For Nuxt version >=2.15 and Nuxt Content version >=1.14
import { $content } from '@nuxt/content'

export default {
  modules: [
    '@nuxtjs/sitemap',
    '@nuxt/content',
  ],
  sitemap: {
    routes: async () => {
      /* Next line only applies for Nuxt version < 2.15
        and/or Nuxt Content version < 1.14 */
      // const $content = require('@nuxt/content')

      const posts = await $content('posts', { deep: true, text: true })
        .where({
          extension: '.md'
        })
        .fetch()

      return posts.map(post => ({
        url: `/articles/${post.slug}`,
        lastmod: post.updatedAt || post.createdAt
      }))
    }
  }
}
Now the sitemap looks similar to the following:

Make your site into a PWA with @nuxtjs/pwa
Introduced by Google, PWA - Progressive Web Application - is a web application that is installable, capable, and reliable regardless of the platform, user, or the network. Some of the benefits of a PWA are performance optimization (faster and smoother animations), the ability to work offline, mobile look and feel, and using hardware features such as push notifications, geolocation, etc.
To convert your project into a PWA, you need to provide a manifest.json to inform the browser that your site is a PWA and how to install it on users' devices. The manifest.json typically includes the application's name, the icons to use, and the URL to use when a user launches the application outside the browser.
Building a manifest.json file is pretty straightforward. Nevertheless, generating the file, meta tags, and icon sets automatically requires time and effort. Fortunately, we can do it using the Nuxt PWA module - @nuxtjs/pwa.
Install and use Nuxt PWA module
To use the module, you need to do the following steps:
- Install the module as a dependency to your project
yarn add @nuxtjs/PWA

#or
# npm i @nuxtjs/pwa
- Add the module to the
buildModuleslist innuxt.config.js.
/* nuxt.config.js */
{
  buildModules: [
    '@nuxtjs/pwa',
  ],
}
- Configure the module options through
pwafield innuxt.config.js
/* nuxt.config.js */
{
  pwa: {
    icon: {},
    meta: {},
    manifest: {},
    workbox: {}
  },
}
in which:
icon- defines the configuration for generating different sizes of icons and favicons, then auto-populating the listmanifest.icons[]in the generated manifest with the icons' paths. You can provide the set ofsizesfor the module to generate icons accordingly or leave it to the default settings.meta- define how the social meta tags for the site will look like.manifest- override the default settings for building the manifest file.workbox- define the support settings for the application to work offline. Workbox is a powerful library dedicated to PWAs, by using service workers and resource caching optimization.
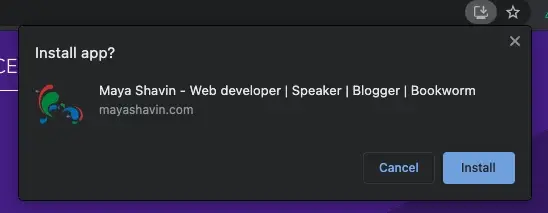
The module generates a manifest.json and the relevant files such as icons during the build. Once deployed, your site becomes a PWA and can be installable as a desktop/mobile app. Also, users can use the application offline when needed.
So far, so good? Awesome. And last by not least, you need web analytics to measure your sites' performance for further SEO improvements.
Add web analytics tracking with @nuxtjs/google-analytics
SEO helps a site appear higher in the search results, thus having a better chance to reach potential users. But to keep users engaged, we need to understand user behaviors across the site. And thus, web analytics tools come to the rescue.
By collecting various data, including link clicks, geographic location, browsers, repeated visits, etc., web analytics tools provide significant insights about sites' visitors and behaviors. Hence it helps to create a better user experience and more.
Several web analytics are available for selection, such as Ackee, Matomo, and Google Analytics. Being a free and widely used tool, Google Analytics offers lots of features to track user activities such as session duration, pages per session, bounce rate, etc., and the information on the traffic source.
It requires manually embedding Google Analytics code snippet to your site and a bit of additional work to have the tool integrated and work correctly with Vue projects (and Nuxt projects).
Or you can use the Nuxt module for Google Analytics - @nuxtjs/google-analytics, which is based on vue-analytics.
Install @nuxtjs/google-analytics
To use the module, you need to do the following steps:
- Install the module as a dependency to your project
yarn add --dev  @nuxtjs/google-analytics

#or
# npm i --save-dev @nuxtjs/google-analytics
- Add the module to the
buildModuleslist innuxt.config.js.
/* nuxt.config.js */
{
  buildModules: [
    '@nuxtjs/google-analytics',
  ],
}
- Configure the module's options with the Google Analytics ID through
googleAnalyticsfield innuxt.config.js
/* nuxt.config.js */
{
  googleAnalytics: {
    id: 'UA-XXX-X'
  }
}
Next, we will explore the basic tracking features the module exposes to us.
Track user behaviors with the @nuxtjs/google-analytics module
Once installed, the module injects a global instance $ga, ready to access anywhere within the application's context.
You can use the instance to track:
- A link click to a specific page using
$ga.page('route-to-page'), - A specific event fired using
$ga.event(). For example:/* component.vue */ export default { methods: { clickToViewProject(projectName) { this.$ga.event({ eventCategory: 'view_project', eventAction: 'click', eventValue: projectName }) } } } - A specific screen hit event using
$ga.screenview() - A specific time event using
$ga.time(), such as:/* component.vue */ export default { methods: { loadPost(postName) { this.$ga.time({ timingCategory: 'load_post', timingVar: 'load', timingValue: 1000 }) } } }
That's it! Your site now has analytics support and ready to go 😉.
Summary
SEO is not a straightforward subject to understand and implement. But the Nuxt team and community ensure we get the suitable modules to accomplish this challenging task, along with other great modules to enhance the look and performance of your Nuxt project.
So far in this post, we uncovered the following modules:
@nuxtjs/i18nfor localization support.@nuxtjs/robotsfor generatingrobots.txtfile.@nuxtjs/sitemapfor generatingsitemapfile.@nuxt/pwafor add PWA support to your application.@nuxtjs/google-analyticsto enable traffic performance tracking for your site using Google Analytics.
We will explore the Nuxt Web Vitals module for performance enhancement in your Nuxt.js application in the upcoming post.
Meanwhile, if you haven't known Nuxt before, I suggest giving it a try and experimenting with the awesomeness and power it can bring to your web development process. And if you built something with Nuxt, please share it with me on Twitter 🔥 or on Facebook.
👉 If you'd like to catch up with me sometimes, follow me on Twitter | Facebook.
Like this post or find it helpful? Hit the share button 👇🏼 😉
Learning Vue
Learn the core concepts of Vue.js, the modern JavaScript framework for building frontend applications and interfaces from scratch