How To Create An Artistic And Personal Intro Video With ChatGPT And Nano Banana
In this post, we will walkthrough the workflow, prompts and strategies needed to create a personalized AI intro video. We will also compare different execution approaches, and explore why a sketch-first workflow can lead to significantly better results compared to a standard, one-shot text-to-video generation.

TL;DR
The stack:
- ChatGPT/Gemini Pro: For my personal identity sketch, storyboard and video sequence script.
- Nano Banana: Core video generation model.
Total time: 1-2 hours
Key Takeaways:
- Creating a visual reference first yields a significantly better result than relying solely on text prompts.
- Always add your photo, otherwise AI tends to hallucinate your likeness.
- Audio is not there yet. It's still more efficient to add music and voiceover manually during post-production.
The Challenge
I have always wanted to a short intro video that feels personal, reflects my work and artistic side, while looking professional enough to reuse across different content channels, whether for my podcast, conference talks, or YouTube videos.
While I have a background in illustration, creating a 10-second animated intro is a entirely different skill set. Storyboarding, animating transitions, and video editing are a whole different world. So, the idea stayed on my wishlist, until AI came.
But does this mean I can simply ask an AI to create an intro video and magically get exactly what I want in a single click, like many LinkedIn posts claim?
Not really. From beautiful demo videos to something that feels personal and represents you, it is a massive challenge.
Initial Approach: Why One-Shot Prompting Failed
My first instinct was to take the most obvious way possible:
- Write a descriptive prompt outlining the video I wanted, with the help of LLMs.
- Feed it to Nano Banana together with my profile photo.
- Get the video and review it.

Straightforward, right?
Technically, the result was impressive. The animation were smooth and the rendering looked polished. The generated character was somewhat similar to my photo.
Except it didn't feel like me. The character looked like a random person rather than Maya. There was little personality, too many visual elements competing for attention, and no clear focus on what I wanted to convey.

At first, I assumed I needed a few more iterations to fine-tune the prompt. However, iteration is not free. Video generation has a daily limits, and I realized I couldn't afford this costly and time-consuming process of trial and error.
The primary issue, I started to suspect, wasn't about Nano Banana itself. It was more about the lack of context and visual reference for the model to understand the story I wanted to tell.
That's when I decided to try things differently.
Step 1: Create A Visual Version Of Yourself First
My number one rule of thumb:
If you want to explain something, sketch it out.
Instead of jumping directly to video generation, I broke the process into smaller steps, starting with a static visual sketch as the primary reference for the rest of the generation workflow.
Since I use ChatGPT frequently, it already has a sufficient understanding of my public profile, work, and interests. Rather than describing all of that from scratch, I focused my prompt on the following three key aspects:
- Goal: What should the image achieve?
Create a visual sketch that introduces me to the audience.
- Styles: How should the image look like? What artistic style should it follow?
Speed paint/watercolor annotations, color sketching, sketch on white paper, technical doodles.
- Rules: What constraints should the image follow?
Number of points, composition between elements, how to integrate different elements in the generated layout.
With those requirements, I came up with the following prompt:
Based on what you know publicly about me and my attached profile image, generate an image as a visual layout to introduce about me to the audience.
Styles:
* Speed paint/ watercolor annotations
* Color sketching
* Sketch on white paper
* Technical doodles
Rules:
* Short, concise, memorable, maximum 4 concise bullet points
* Preserve my actual likeness
* Convert the photo into hand-drawn sketch/speed paint watercolor style, integrated proportionally balanced into the artwork.
* Proper conference slide composition
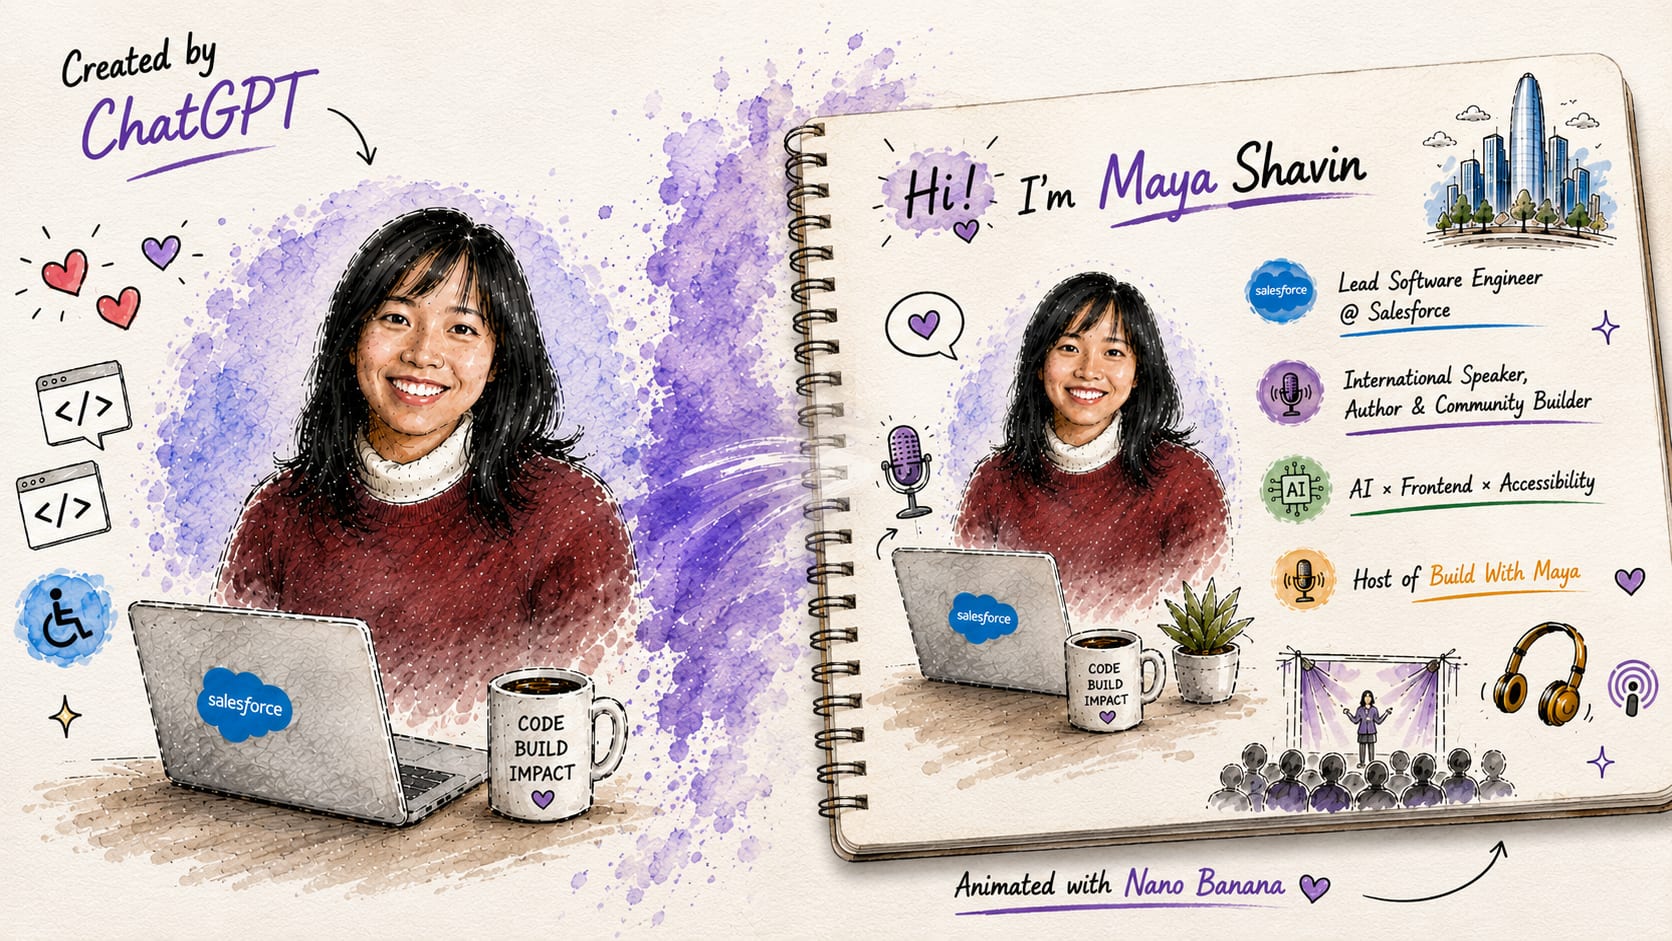
The result wasn't perfect, but it was surprisingly good. While the generated image contains too much texts, inconsistent bullet icons, and a bigger head-shot than expected, the model captured the right aesthetic elements and theme very well. It accurately reflected my core focus areas, and the overall design style felt pretty close to what I had in mind.
Note: Having an maintained a public presence likely helped ChatGPT to infer the right details such as my website color palette and key themes. If you don't have a public profile, you can simple replace the line:
What you know publicly about me
with a list of your background details or exact content.
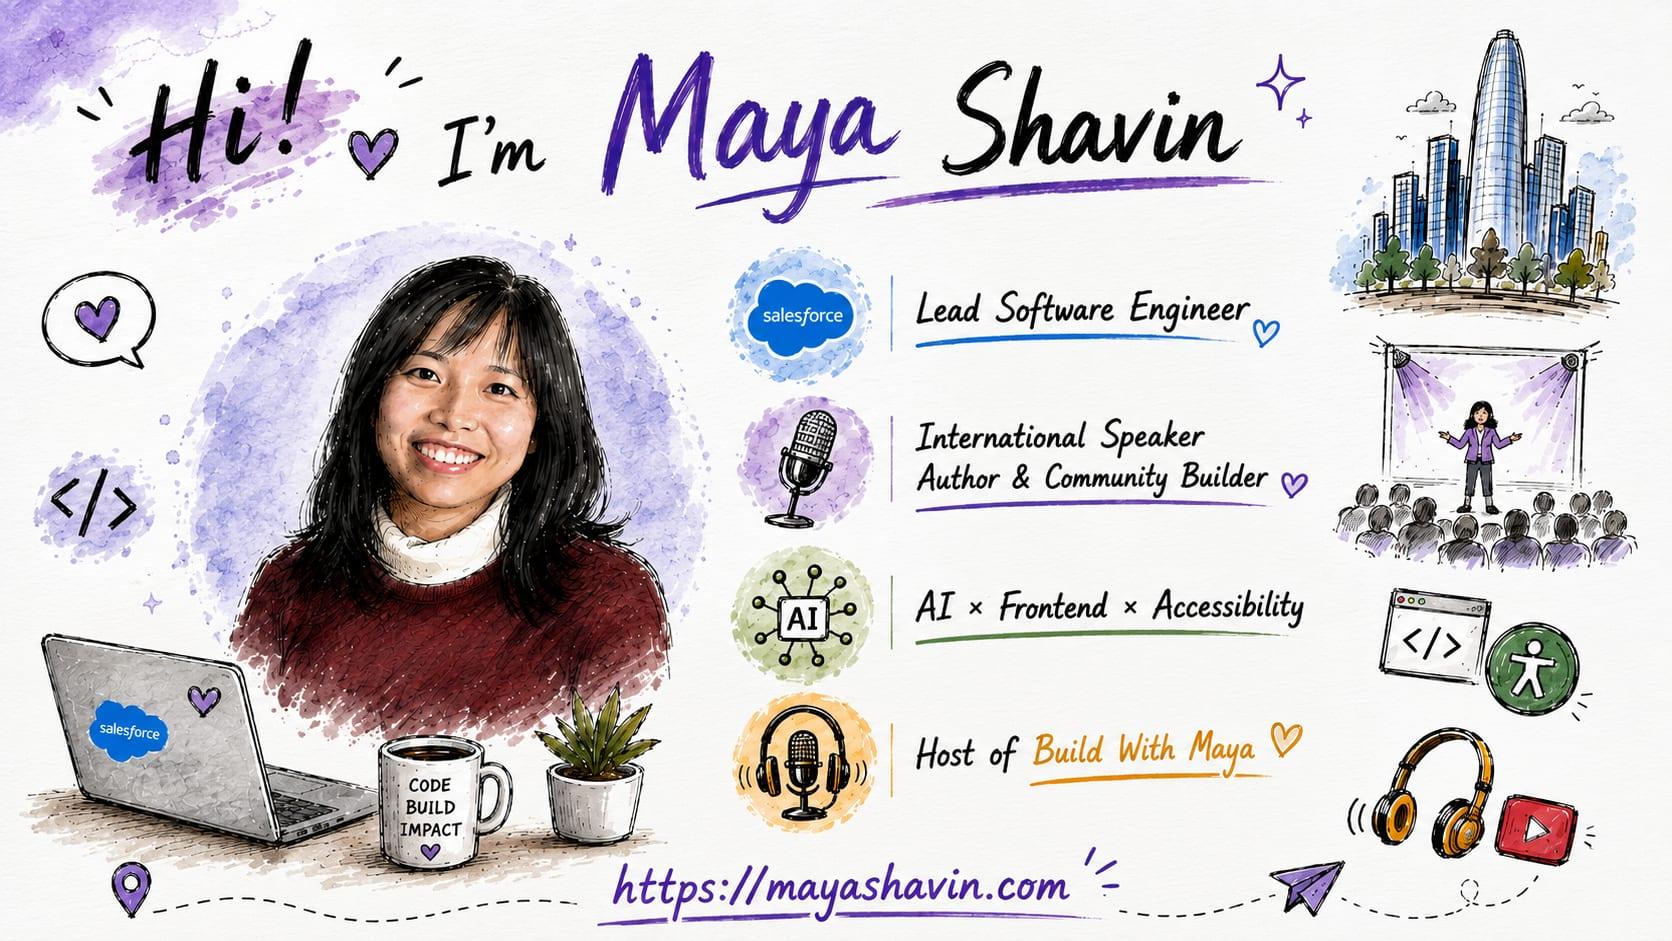
After a few iterations, I refined the sketch to a version I'm happy with. I finally had a visual anchor and a reference as the foundation for the next step in my workflow. I was no longer generating a random video, but a recognizable personal storyboard.
Step 2: Turning the Sketch Into a Story
Creating a video is very different from creating a static image. Even within a short 10-second intro, you still need to think about the motion, transitions, and the elements sequence. In many ways, the process is close to planning a movie storyboard.
I already have a visual representation of myself from step 1. The next step was figuring out how the sketch would come to life. For that, I asked ChatGPT to build out an intro sequence based on the sketch, using a below prompt:
Generate a 10-second intro sequence script with hand-drawn sketch elements appearing progressively. The output should be optimized for Nano Banana video generation.
Grounding the Storyboard Prompt
Before sending the generated storyboard to Nano Banana, I added a few more grounding rules to it, such as:
- Who is this intro for (
@me) - The sketch should be used as a style reference / storyboard
- The final animation should preserve the existing illustration style.
Important tip: Nano Banana includes safeguards around generating content of real individuals. Explicitly referencing yourself using terms like @me, my sketch, or my profile in the prompt ensures the content is based on your own uploaded image and helps the model stay aligned with your intent.
Here is the shortened version of the final storyboard prompt I used:
Timeline:
0:00 – 0:01
Blank textured paper.
“Hi!” is written by hand in black ink.

0:01 – 0:02
The text writes itself naturally:
“I’m Maya Shavin”
Sparkles and doodles animate around the name.

0:02 – 0:04
A watercolor splash appears center-left.
A portrait of Maya is gradually sketched from pencil lines into a fully colored illustration
Hair, face, clothing, and shading appear step-by-step.

0:05 – 0:06.5
Three watercolor badges and the associated text appear one after another.
Each line appears with realistic pen-writing animation.

0:06.5 – 0:08
Technology and podcast-related doodles appear.

0:09 – 0:10
Camera slowly zooms out.
The paper airplane flies across the bottom of the page leaving a dotted sketch trail.
Hold on the complete illustration for the final second.

End frame:
A finished hand-drawn portrait of Maya Shavin surrounded by technology, accessibility, AI, speaking, podcasting, and community-building illustrations.
Bringing It To Life with Nano Banana
At this point, the workflow was finally complete. Instead of asking Nano Banana to generate a video from a single prompt, I fed it with three inputs:
- The storyboard/script describing the sequence of animations and elements.
- The visual reference sketch created in the first step.
- My original profile photo as the source of truth for my appearance.
As it turns out, the profile photo was crucial. While Nano Banana could interpret the illustrative sketch style, it struggled to extract my face accurately from the illustration alone. Without the real photo, the model sometimes hallucinated, drifting from one version of Maya to another. Providing both the sketch and the photo helped increase the consistency for the visual identity.
But even then, the process wasn't entirely smooth. There were moments where the model rejected the generation because it interpreted the prompt as creating content about other people. Other times, the transition between frames felt awkward, or the generated character looked noticeably different from me. And working against the daily video generation quota added pressure to get it right within fewer iterations.
Fortunately, thanks to the groundwork laid in the previous steps with the sketch and the storyboard, I didn't need many iterations before reaching the version I was happy with.
The model followed a visual and narrative plan that I had defined, and that's my biggest takeaway from this experiment: the quality of your final video is set long before you ever hit Enter on the video generation chat session.
What I Observed
This experiment gave me plenty of "whoopsies" and "aha" moments, such as:
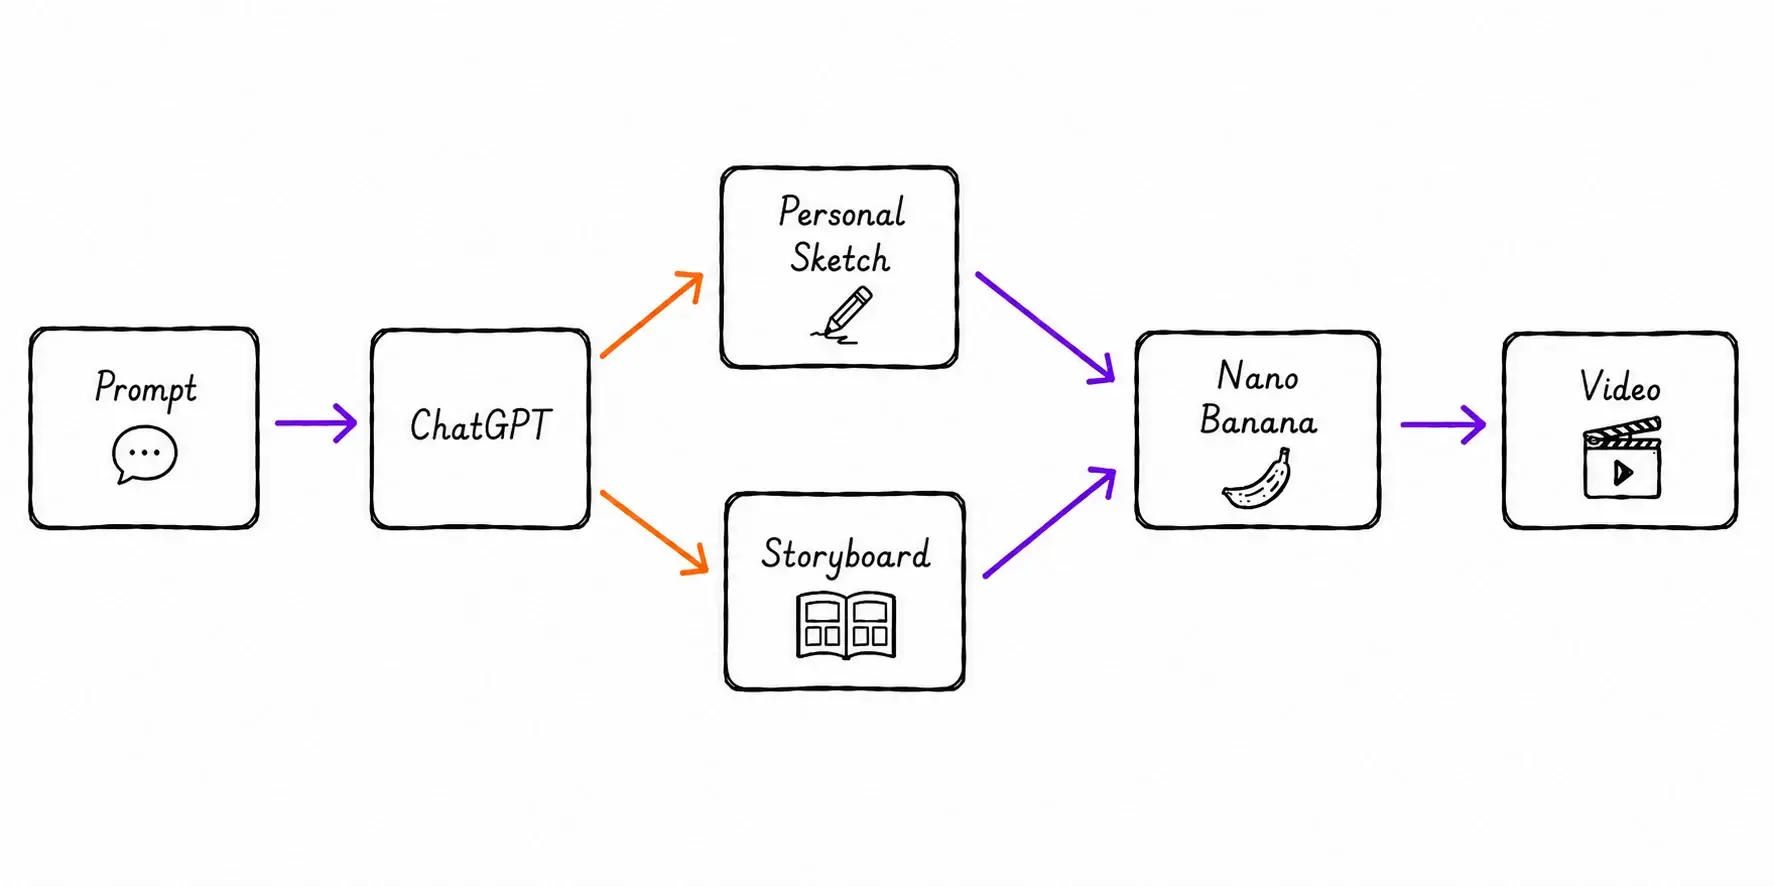
Multi-Step Workflows Beats One-Shot Generation
By breaking the process into smaller steps (sketch → storyboard → video), the AI model was able to produce higher quality outputs than trying to generate the video directly from a single prompt. Additionally, this multi-step workflow approach forced me to think more clearly about the overall story I wanted to tell, while giving the model more context to work with in every stage. It’s a win-win, where I spend less time on regenerating the video, and more time on refining the parts that mattered.
Visual Reference Matters More Than Instructions
I was really surprised by how much a strong visual reference could improve the results. Just like how we often use sketches to communicate ideas to engineers or designers, AI models seem to respond significantly better when having something visual to anchor on.
"A picture is worth a thousand words" seems to apply here as well. It does require more tokens, but it was worth the investment.
Consistency Is Still A Challenge
Multi-modal AI models have gotten better in maintaining consistency, but there is a long way to go. Many times I found myself adding the same instruction repetitively:
DO NOT CHANGE anything
Without this rule, the model tend to occasionally change something already correct, like icons, my face, or the text unexpectedly in each iteration. Moreover, I noticed how the quality can degrade over time, such as broken texts, low resolution, especially towards the end of the day, or after a long session.
Different Account Types Can Produce Different Results
One unexpected observation was how the outputs can be noticeably different between my Pro Personal account and Enterprise account, despite using the same model and input. The Enterprise account often produced a more polished and accurate video, while the Personal account usually leaned into more playful and visually engaging animation.
Since this is a small experiment, I wouldn't jump to any conclusion from it. Still, it was interesting to observe the differences, and wonder what factors could contribute to it.
Unexpected Accuracy
It's surprising how accurately ChatGPT could capture the theme in my work, from engineering to speaking, mentoring, and building. The sketch felt less like a generic AI image, and more like a visual summary of my personal brand. And seeing that sketch come to life in the final animation was no doubt my sweetest moment.
What I Learnt About Creating Videos With AI
I’m not a professional video creator, nor a prompt expert. That said, these below lessons are more of a personal experience than a standard AI practice:
AI Is Not Your Mind Reader
The biggest mistake I made was expecting AI to magically interpret my intention and get everything right in the first try. Instead, I found it much more effective to treat AI as my collaborator, and iterate with it the same way I would with a human designer or editor. The more information I provided, the better the model could align with what I wanted to achieve.
Start With A Visual Representation
Nano Banana is a powerful tool, but the final video was only as good as the inputs I provided. By investing time into the sketch, I leveled up the input for the storyboard phase, which in turn reduced ambiguity for the final video rendering phase. It's a chain reaction, where each stage builds upon the success of the one before.
Moving forward, I would never skip this initial step of creating the static visual sketch. It acts as the foundation for the entire workflow, serving as shared reference for both the storyboard and the video generation process. Without it, the final outcome would likely rely on random generation luck, and that's not a good thing.
On Build With Maya, I share lessons from software engineering, AI, content creation, and the systems behind building things that scale.
If you enjoyed this breakdown, you might enjoy the podcast too.
Final Thoughts
It's amazing to discover how much a well-structured workflow shaped the final output. Tools like ChatGPT, Gemini, or Grok help generate the assets, but the workflow determines what level of the final product can reach.
That said, my final note for those who are interested in trying AI video generation: start with your story first (both visually and narratively). It might make all the difference.
👉 Learn about Vue 3 and TypeScript with my new book Learning Vue!
👉 If you'd like to catch up with me sometimes, follow me on X | LinkedIn.
Like this post or find it helpful? Share it 👇🏼 😉
Learning Vue
Learn the core concepts of Vue.js, the modern JavaScript framework for building frontend applications and interfaces from scratch